Floating Banquette
*
Floating Banquette *
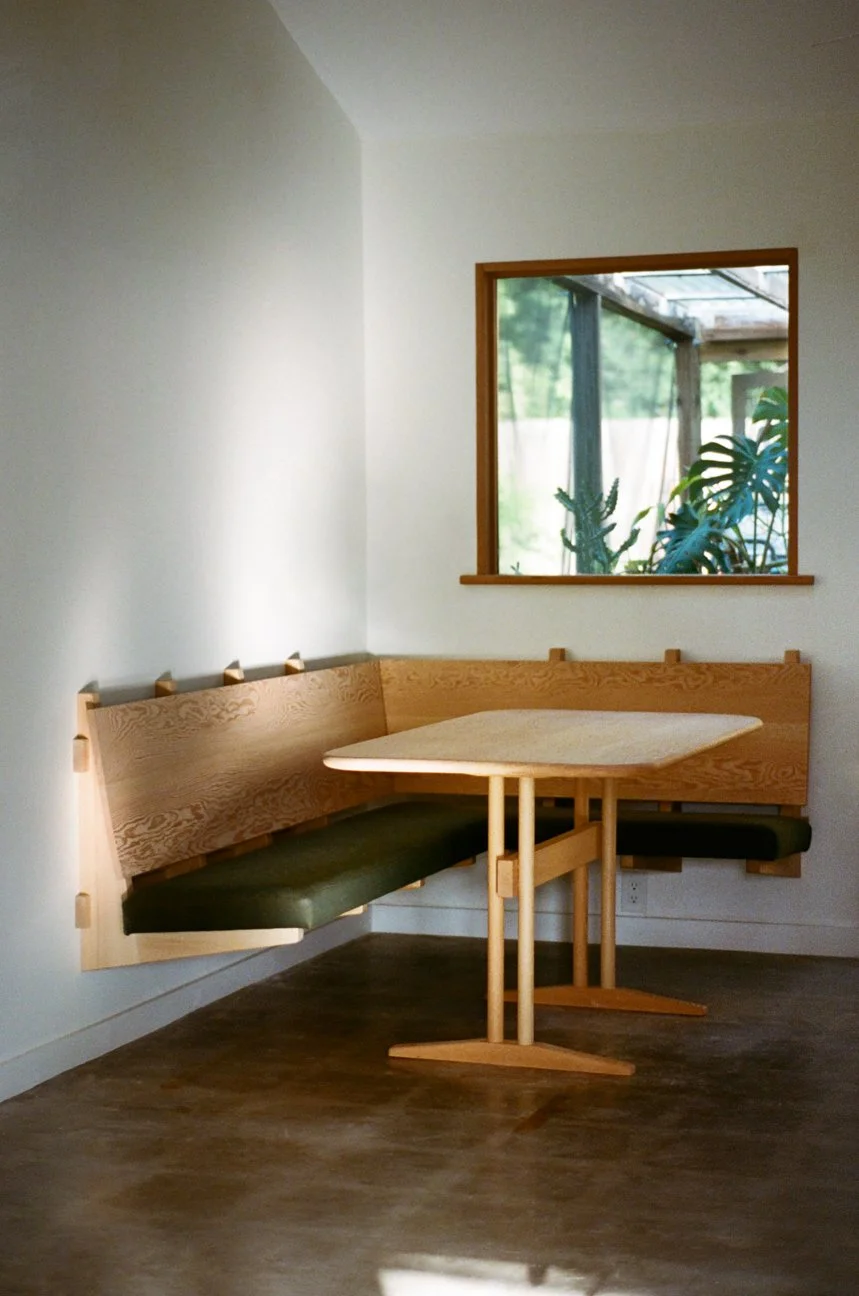


Folks often ask me to sell them the plans for this floating banquette – I’d much rather give them away for free. I’m including a link to the sketchup model, drawings with dimensions called out, and a list of helpful tips and tricks we used.
This is not an easy DIY project – you need to be a decent trim carpenter or furniture maker to take this on, or modify it to suit your tools and skills. Isn’t that the fun part, though? Good luck!! Send pics!!

Side View

Front View

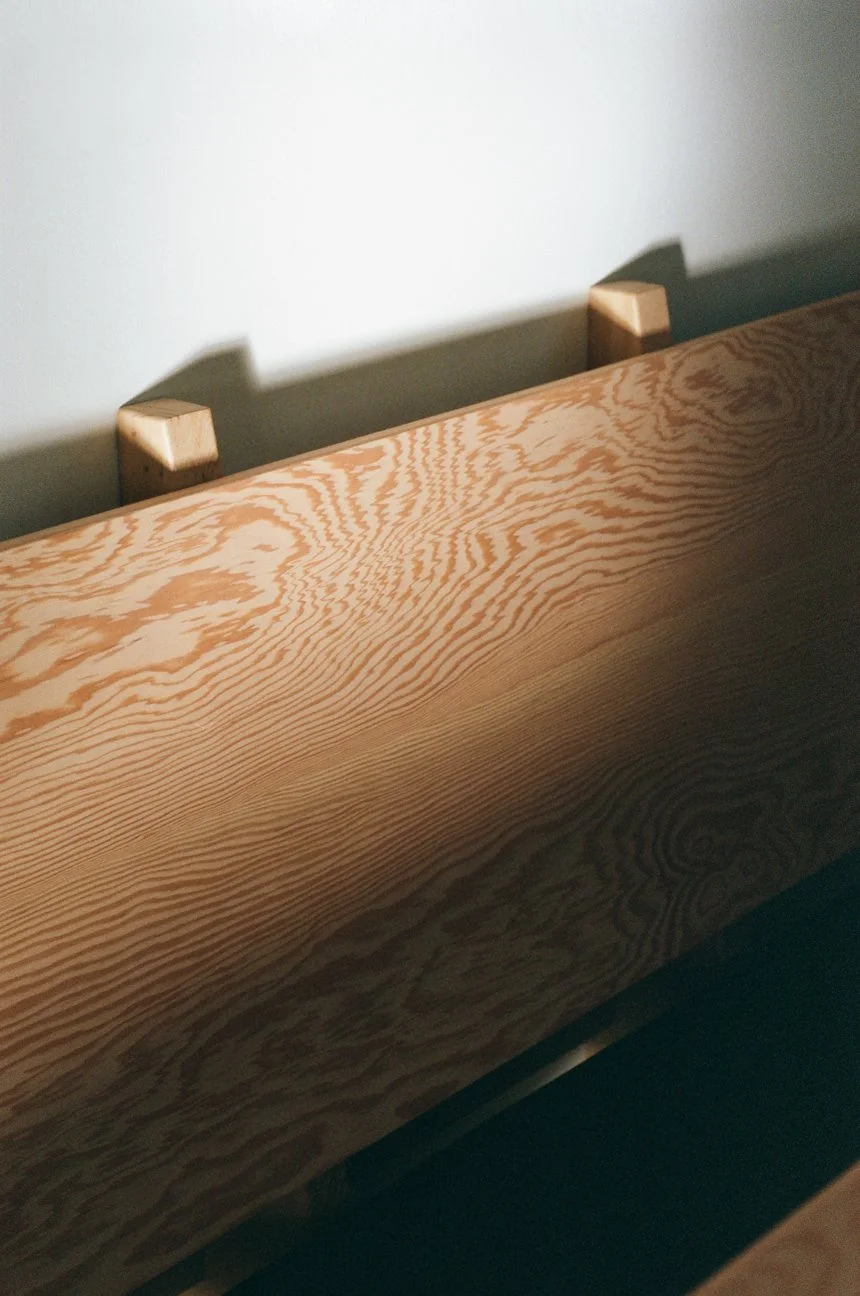
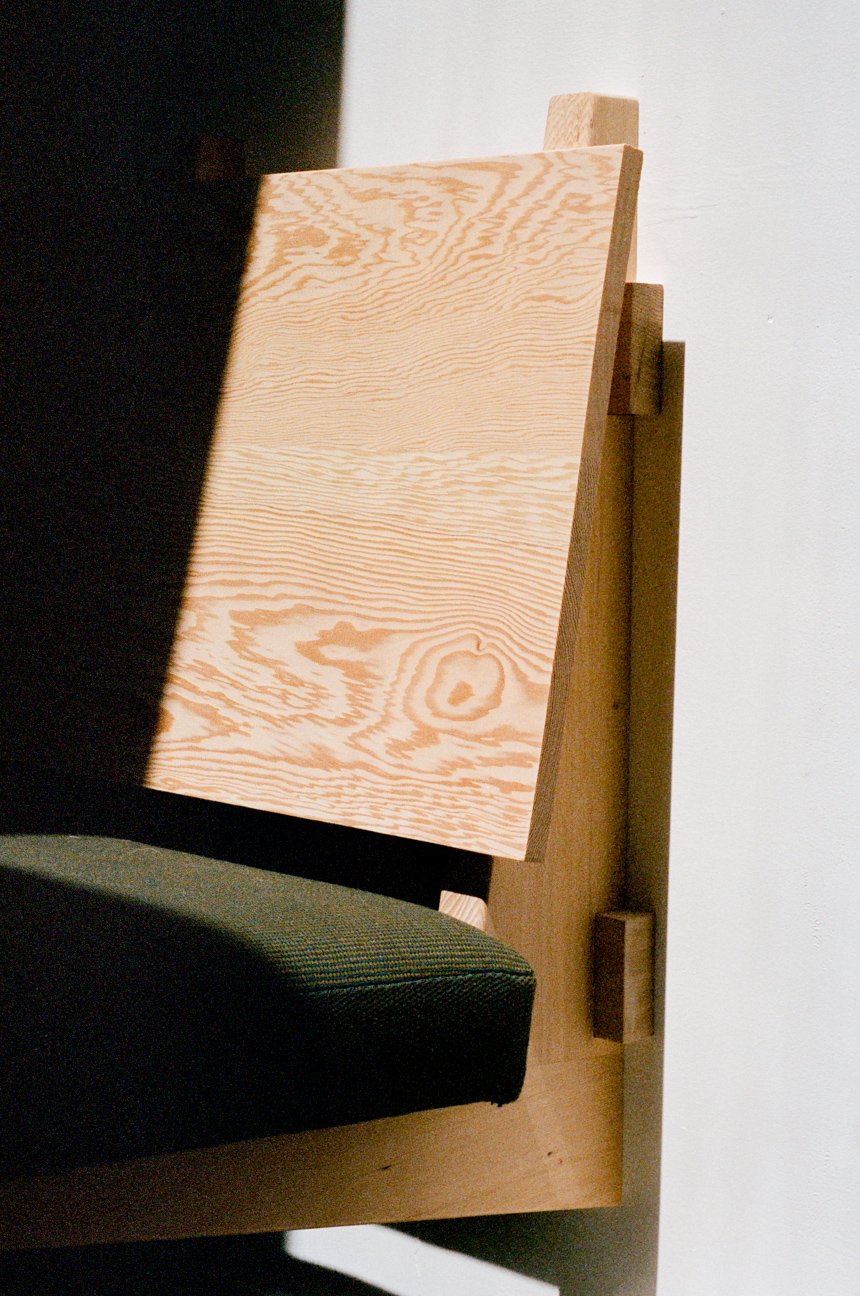
Brackets – Half lap joinery

French Cleats attach Backrest to Bracket

Brackets are spaced approx. 16" on center

Seat, Cushion, & Backrest dimensions

Exploded view of bracket joinery

Section view of fasteners

Parts List / Diagram

Bracket Geometry
Plan
-
This design combines some Minimalist elements (hiding some of the structure / floating things off the floor) with a Craftsman approach (showing off some of the structure with the cleats and brackets). Tweak it to suit your needs – it could be built to rest on the floor with storage drawers in the base, for example.
-
Building furniture into a space comes with benefits and drawbacks. You save some space not having to pull chairs in and out from a table – but you’re trading in some flexibility…it’s pretty hard to rearrange things once they’re installed. Make sure the compromise is worth it.
-
Comfortable seating starts with a prototype. Build these out of plywood and test things out before you commit. It can be helpful to build 2 separate chairs so you can A / B test what is comfortable as you make minor adjustments. Seat height, seat depth, the angle of the backrest and the seat…all of these things make a difference. Shims or spacers can help you fine tune what feels most comfortable for your body. Test, test, test.
-
Pick a shop early and talk with them about what they need to be able to make you a custom cushion, check their lead times, etc. Order fabric samples if you need to, check them against wood species you are thinking of using and how both of those look in the actual lighting of your space.
-
Confirm the wall framing however you can – typical framing is 16” on center, but interior walls are often 24” on center. This design is adaptable to a lot of different remodel situations – the wall cleat gets anchored to the studs (or even masonry) and then the brackets can be hung anywhere along its length. You can adjust the spacing of the brackets regardless of how the wall was built.
-
The photos show clear, vertical grain Douglas fir brackets contrasted against a flat-sawn Douglas fir backrest. The grain wraps through the corner and the panel itself is a glue-up of two boards – the narrower on top, and arranged for the grain to flow easily. I like to take photos of the boards I’m making a panel of during the milling process, cut them up and flip them around until I find an arrangement I like – easier to explore all the options this way.
Build
-
We built this banquette using rough lumber milled on a jointer and planer, and a simple jobsite table saw for the joinery. The joinery is a half-lap joinery cut with a dado stack, but you could use a router too. A flat–tooth kerf blade and a ton of passes can also work if you don’t have a dado stack. And if you don’t have access to a jointer and planer, most lumber yards will do some milling for pretty cheap.
-
It’s obviously super important to keep the brackets consistent – make a pattern. We like 1/2” MDF or plywood for this and a router with a flush trim bit
-
Half-lap joinery is sort of hard to glue-up – we used toggle clamps and a jig to hold the parts
-
Brackets first – cut the blank parts, then the tapers, then the half lap joinery, then glue them up, then notch them, then finish the edge details, and finally mill the wall cleats to the thickness of the notches in the brackets.
-
Doubled–up 3/4” ply instead of solid wood – no joinery needed :)
-
We did a 1/4” roundover on a lot of the edges, a little swoopty at the tip of the bracket…often times, it’s the little things that make the design come together. Proportions are important – the stickout of the cleat past the bracket, how much the top of the bracket flies past the backrest, how far the cushion overhangs…those are all things to keep your eyes on.
Install
-
The easiest way to install this is to preassemble the bracket to cleat connections and then hang the whole subassembly at once on the wall. Wood screws from the back join the brackets to the cleat, then structural screws join the cleat to the wall framing – voila!
-
Old homes rarely have 90 degree corners, so we cut 3/4” plywood for the cushion substrate AFTER the banquette was on the wall. If you’re doing a corner, you will have a compound miter because of the seat angle. We just used mending plates and screws to join those two pieces of the template – it’ll get covered up by the foam and upholstery, after all.